Preparation
In the previous tutorial, we delved into using a pre-trained model from Hugging Face to recognize different image classes. This allowed us to get started with image classification quickly, without having to train a model from scratch. However, pre-trained models may not always perform optimally on your specific dataset. That’s why in this tutorial, we will be focusing on building our own custom image classification model using a tool called Teachable Machine.
Teachable Machine is a web-based machine learning tool. With Teachable Machine, you can easily create and train your own machine learning models without writing any code. The tool provides a simple and intuitive interface that guides you through the process of selecting a type of model, uploading your training data, and training the model to recognize specific patterns or objects. Once the model is trained, you can evaluate its accuracy by testing it on new data.
Building your own model with Teachable Machine is an excellent way to learn about how machine learning models are trained and how they can be used to recognize patterns in data. With just a few clicks, you can train a model that is tailored to your specific use case, improving its accuracy and performance. Additionally, by creating your own model, you have complete control over the data and the results, making it easier to understand how the model is making its predictions.
Introduction of Teachable Machine
An introduction video for Teachable Machine:
Question: How does Teachable Machine work?
Hint: Teachable Machine uses transfer learning, which is a simplified version of deep learning. This allows users to train effective machine learning models with limited training data, making it possible for beginners to create models even if they don’t have a lot of data to work with. More details could be found at https://codelabs.developers.google.com/tensorflowjs-transfer-learning-teachable-machine#0
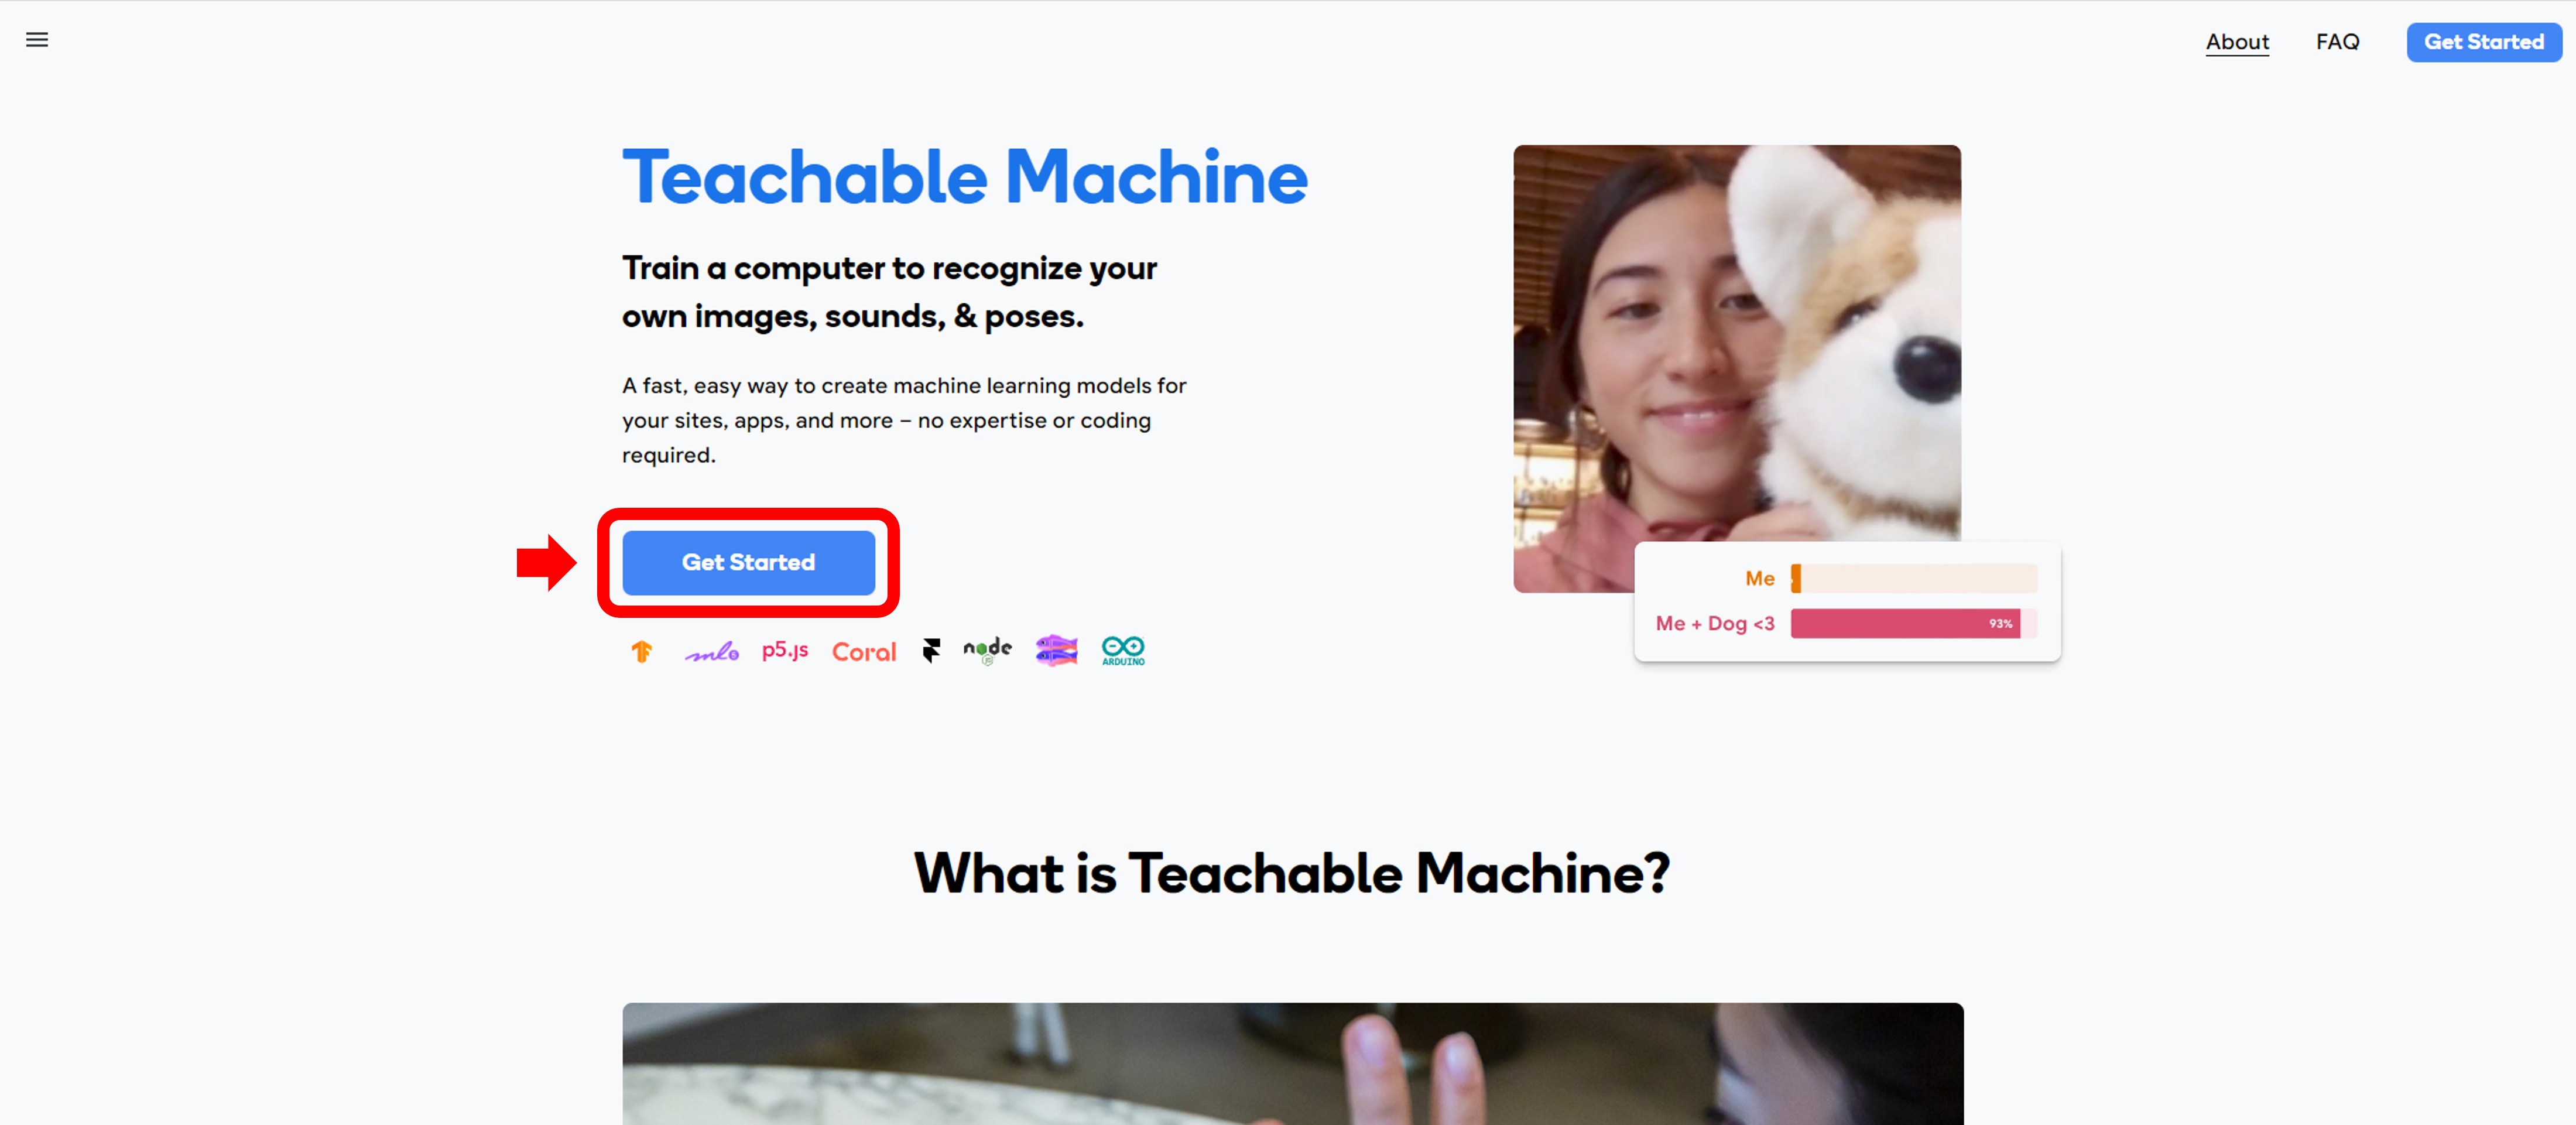
In this preparation, we will assist you to become acquainted with Teachable Machine. Please open the following link (https://teachablemachine.withgoogle.com/). The link will direct you to the website shown in the following picture, and press the button “Get Started”.
Before attending the tutorial, complete the tasks listed in the following subsections. We will discuss the results at the beginning of the tutorial session. In the upcoming tasks, we will tackle two different types of classification - image classification and audio classification. The image classification task will be represented by a red frame, while the audio classification task will be represented by a green frame.
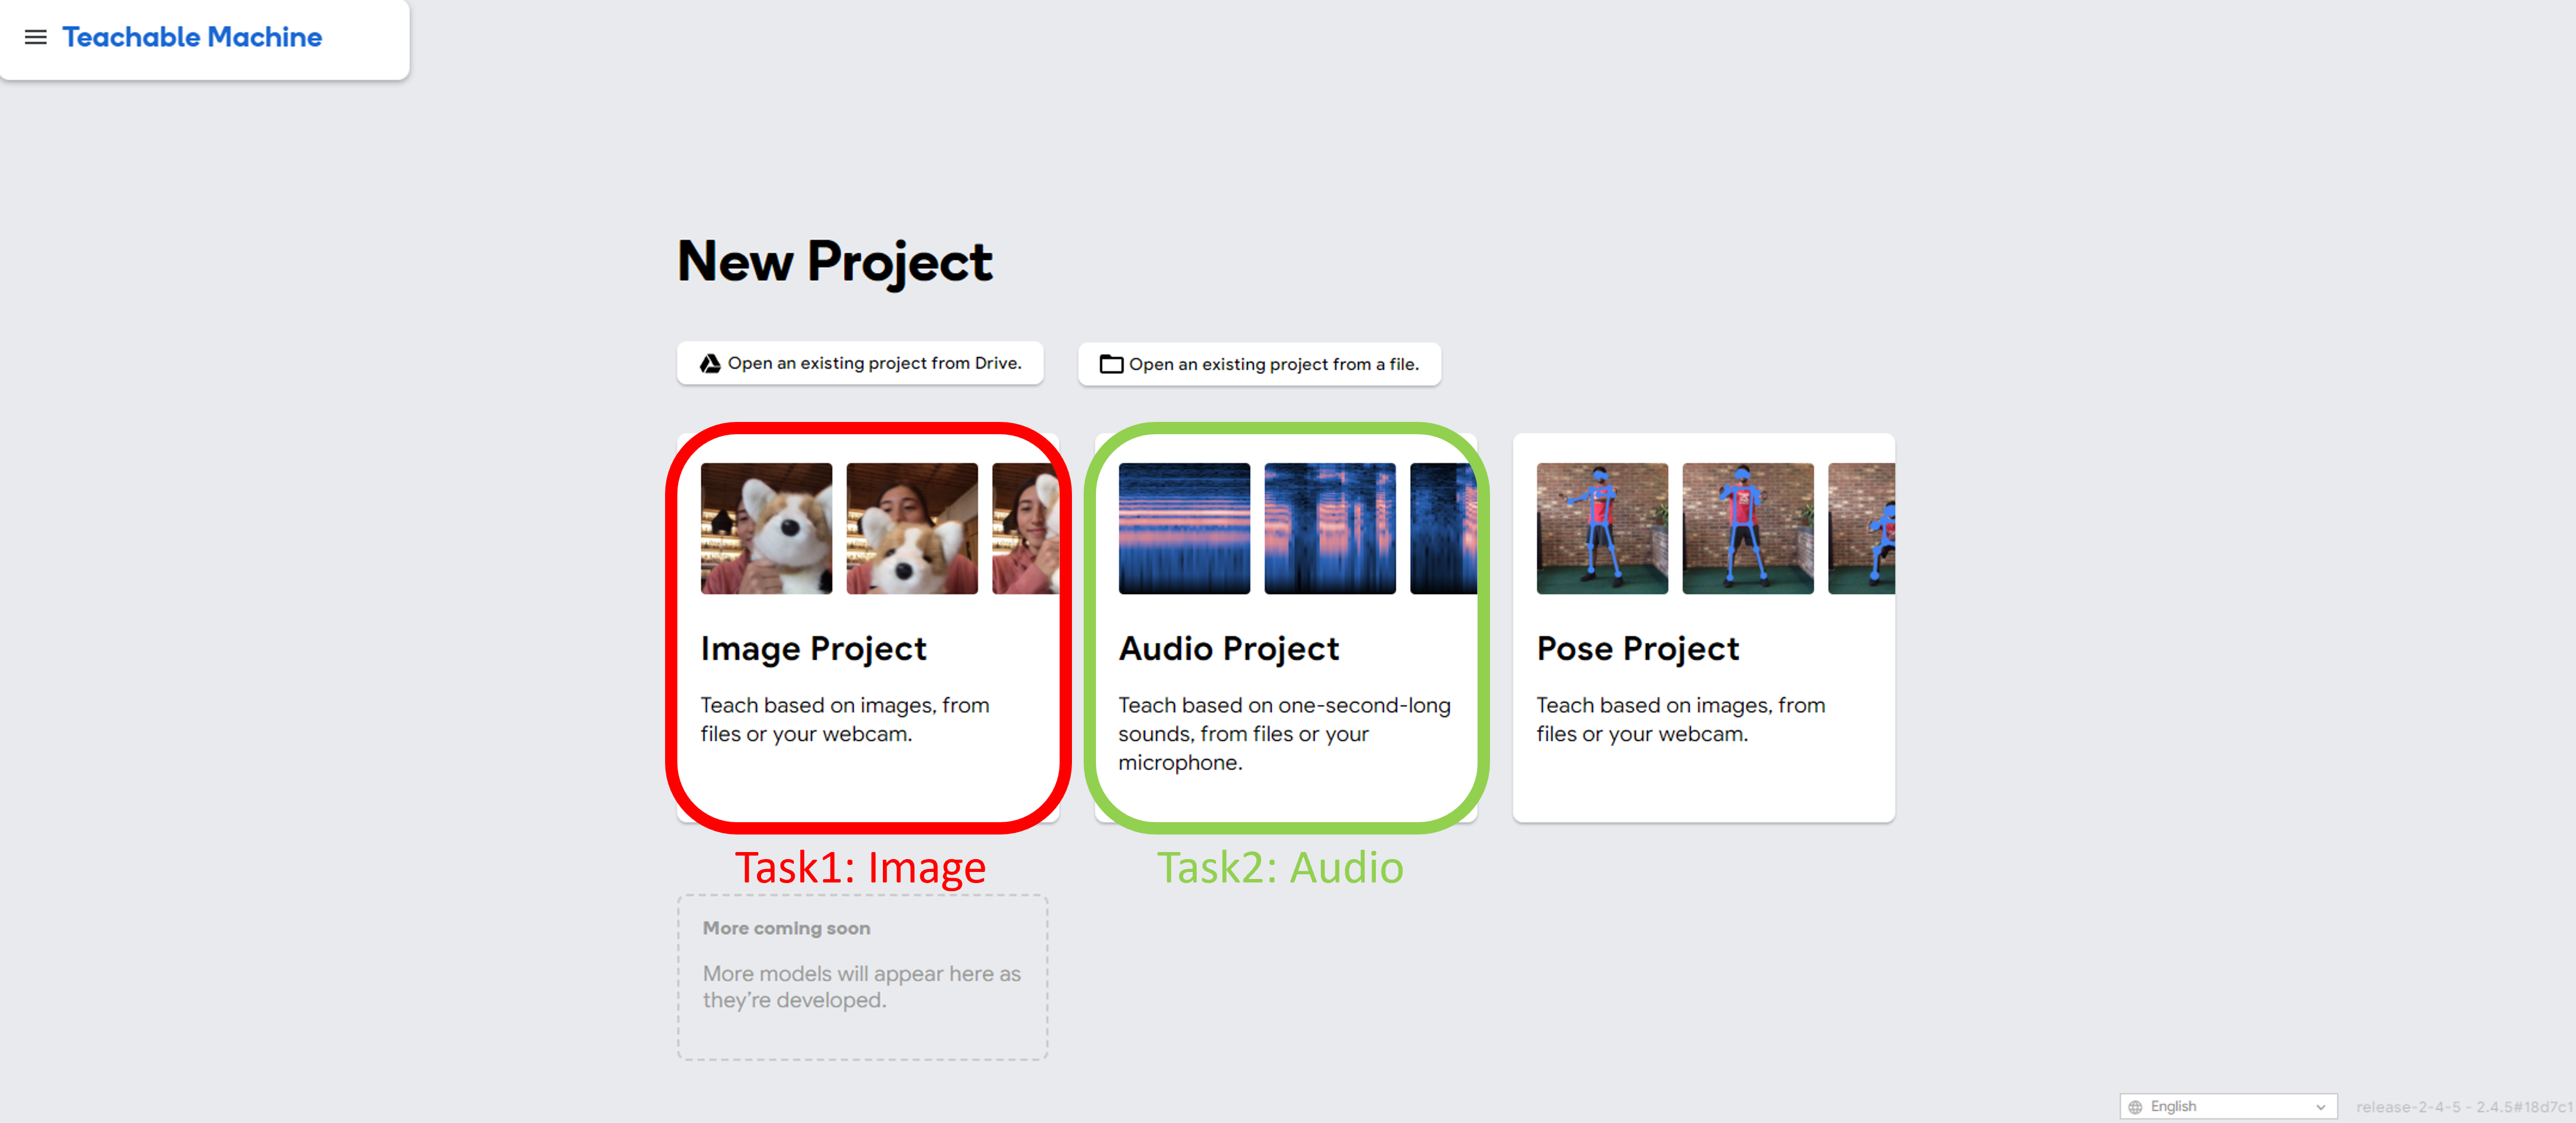
Task 1: How to use Teachable Machine - Image
This following tutorial is originated from Bananameter.
How to Train it
-
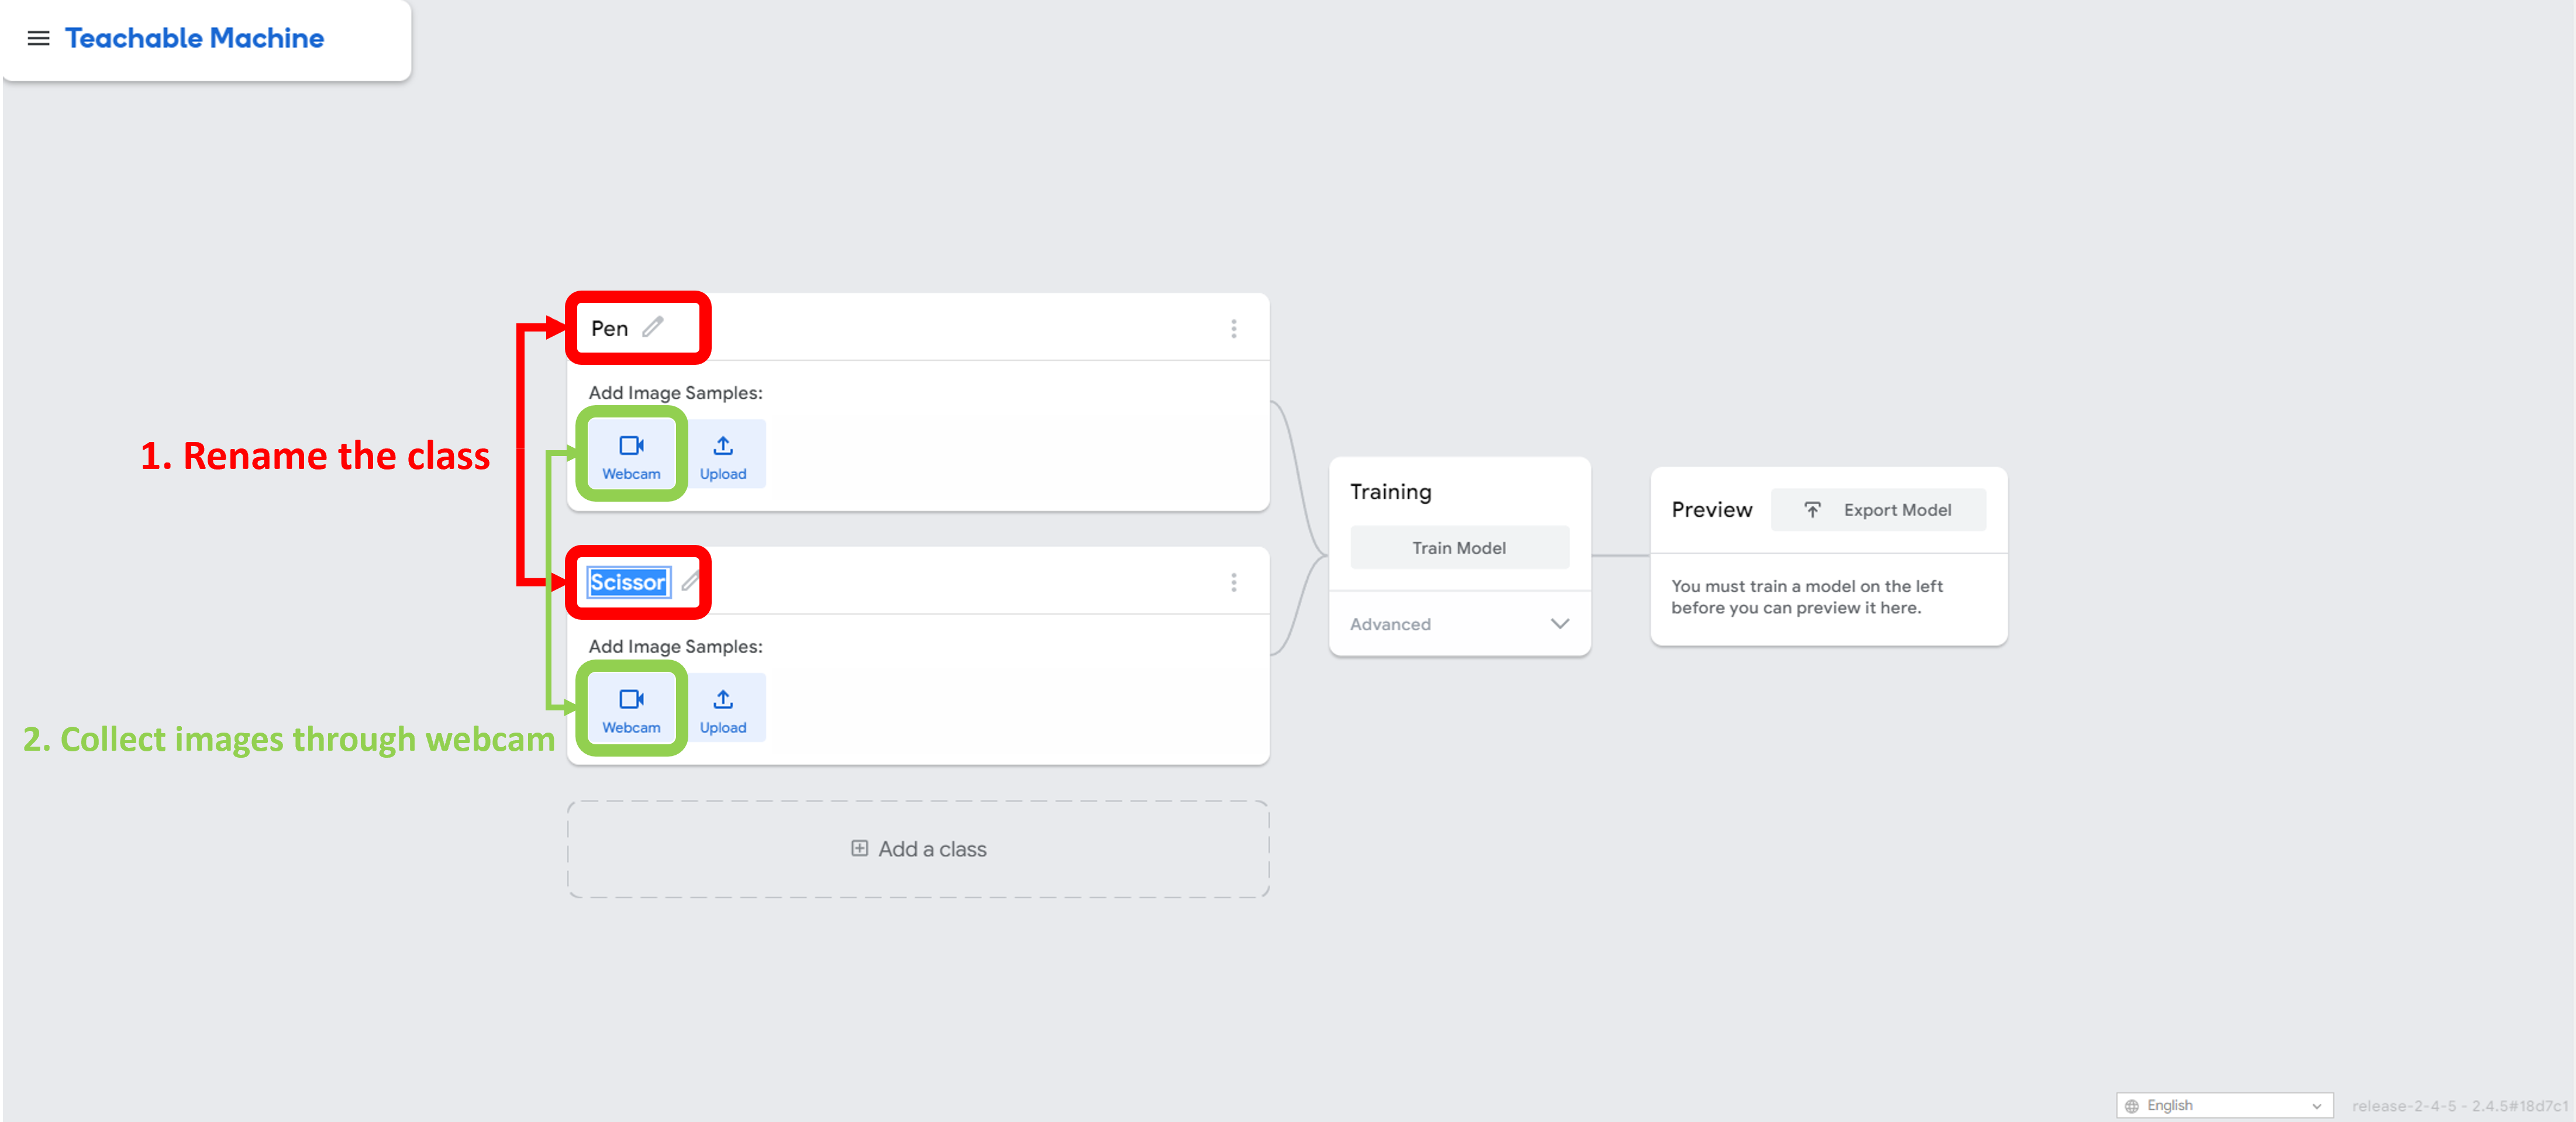
To train the machine, the first step involves defining the various categories or classes that it will learn to differentiate. In this instance, we will create two classes - one for pens and another for scissors. These classes form the basis for the machine’s learning journey. By establishing these categories, we are giving the machine a clear direction on what it needs to identify and what features or patterns it should focus on.
-
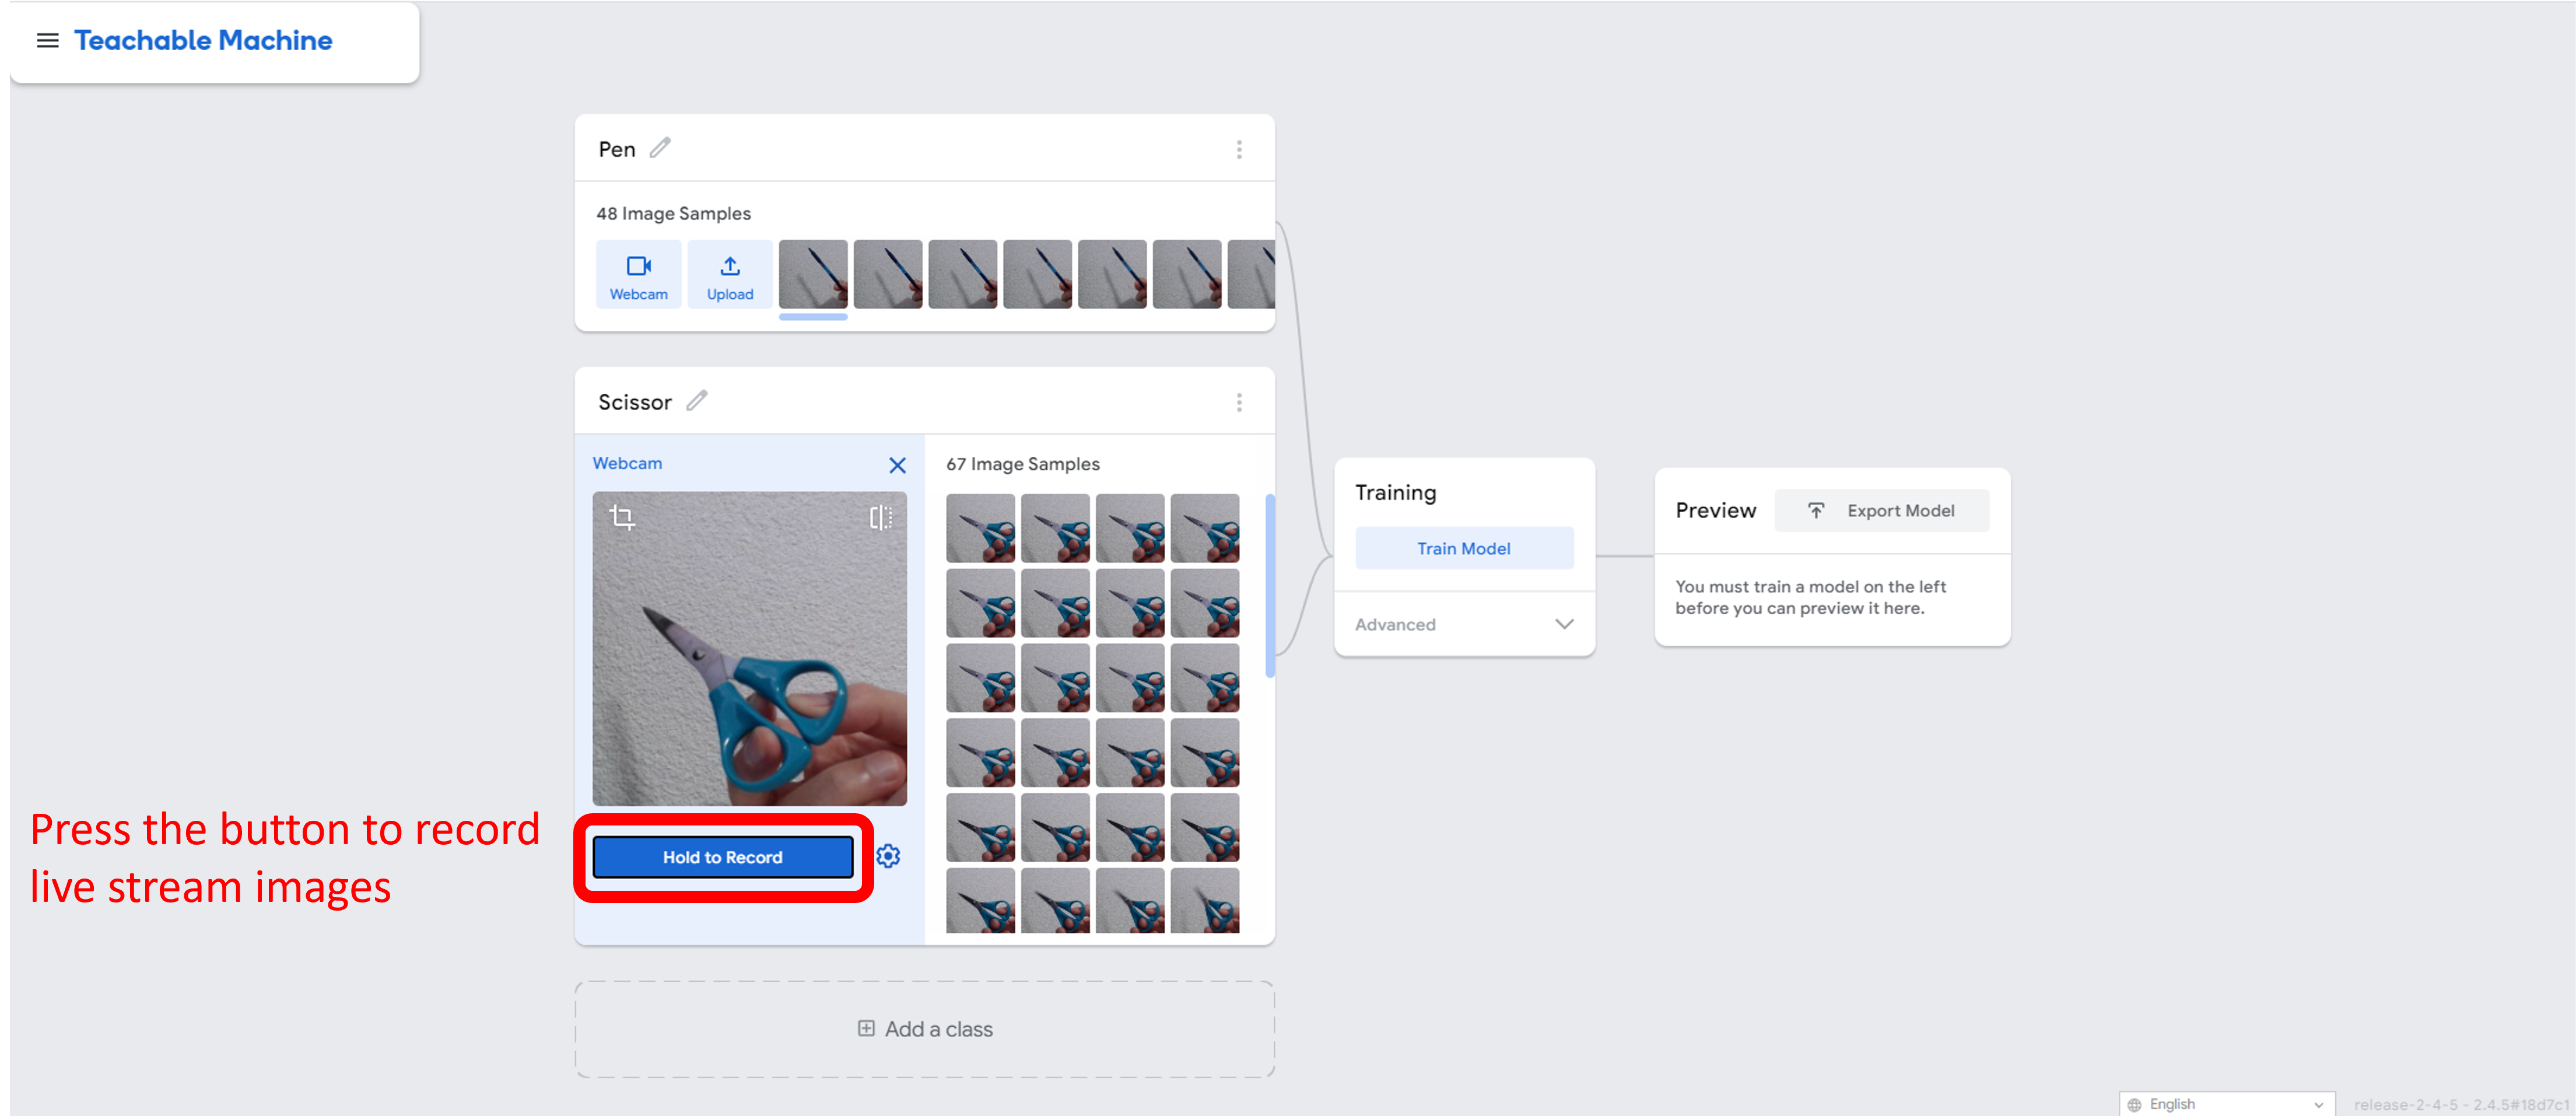
Now that the classes have been defined, it’s time to give the machine some examples to learn from. I will provide examples for both classes through webcam, including pens and scissors.
-
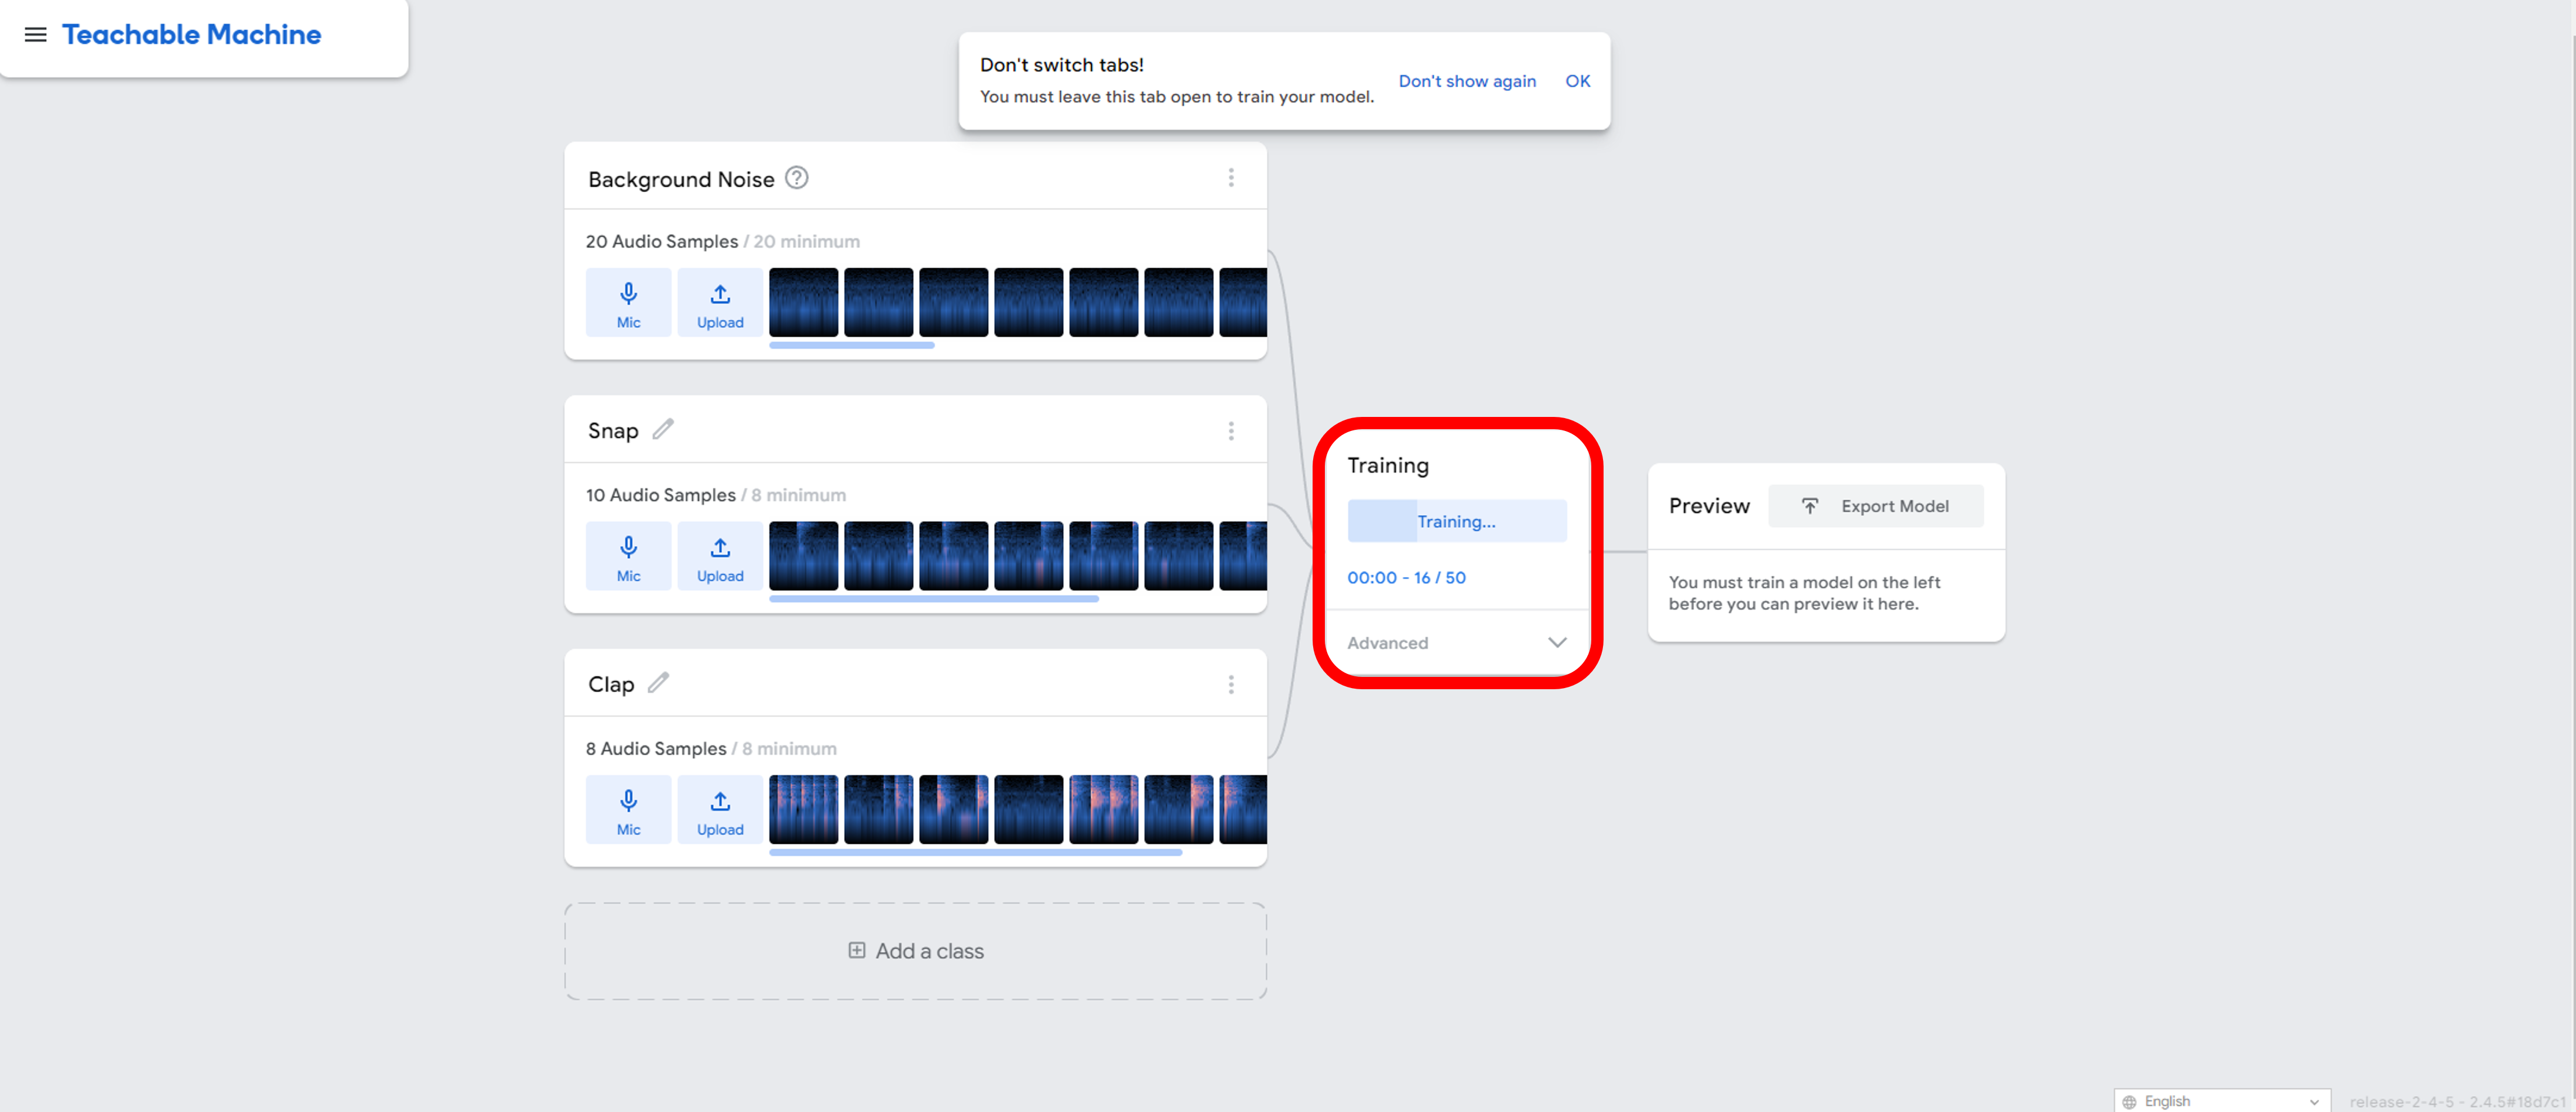
With all of the classes ready, it’s time to begin the training process. I simply need to hit the train button and the machine will start learning from the examples I have given for each class.
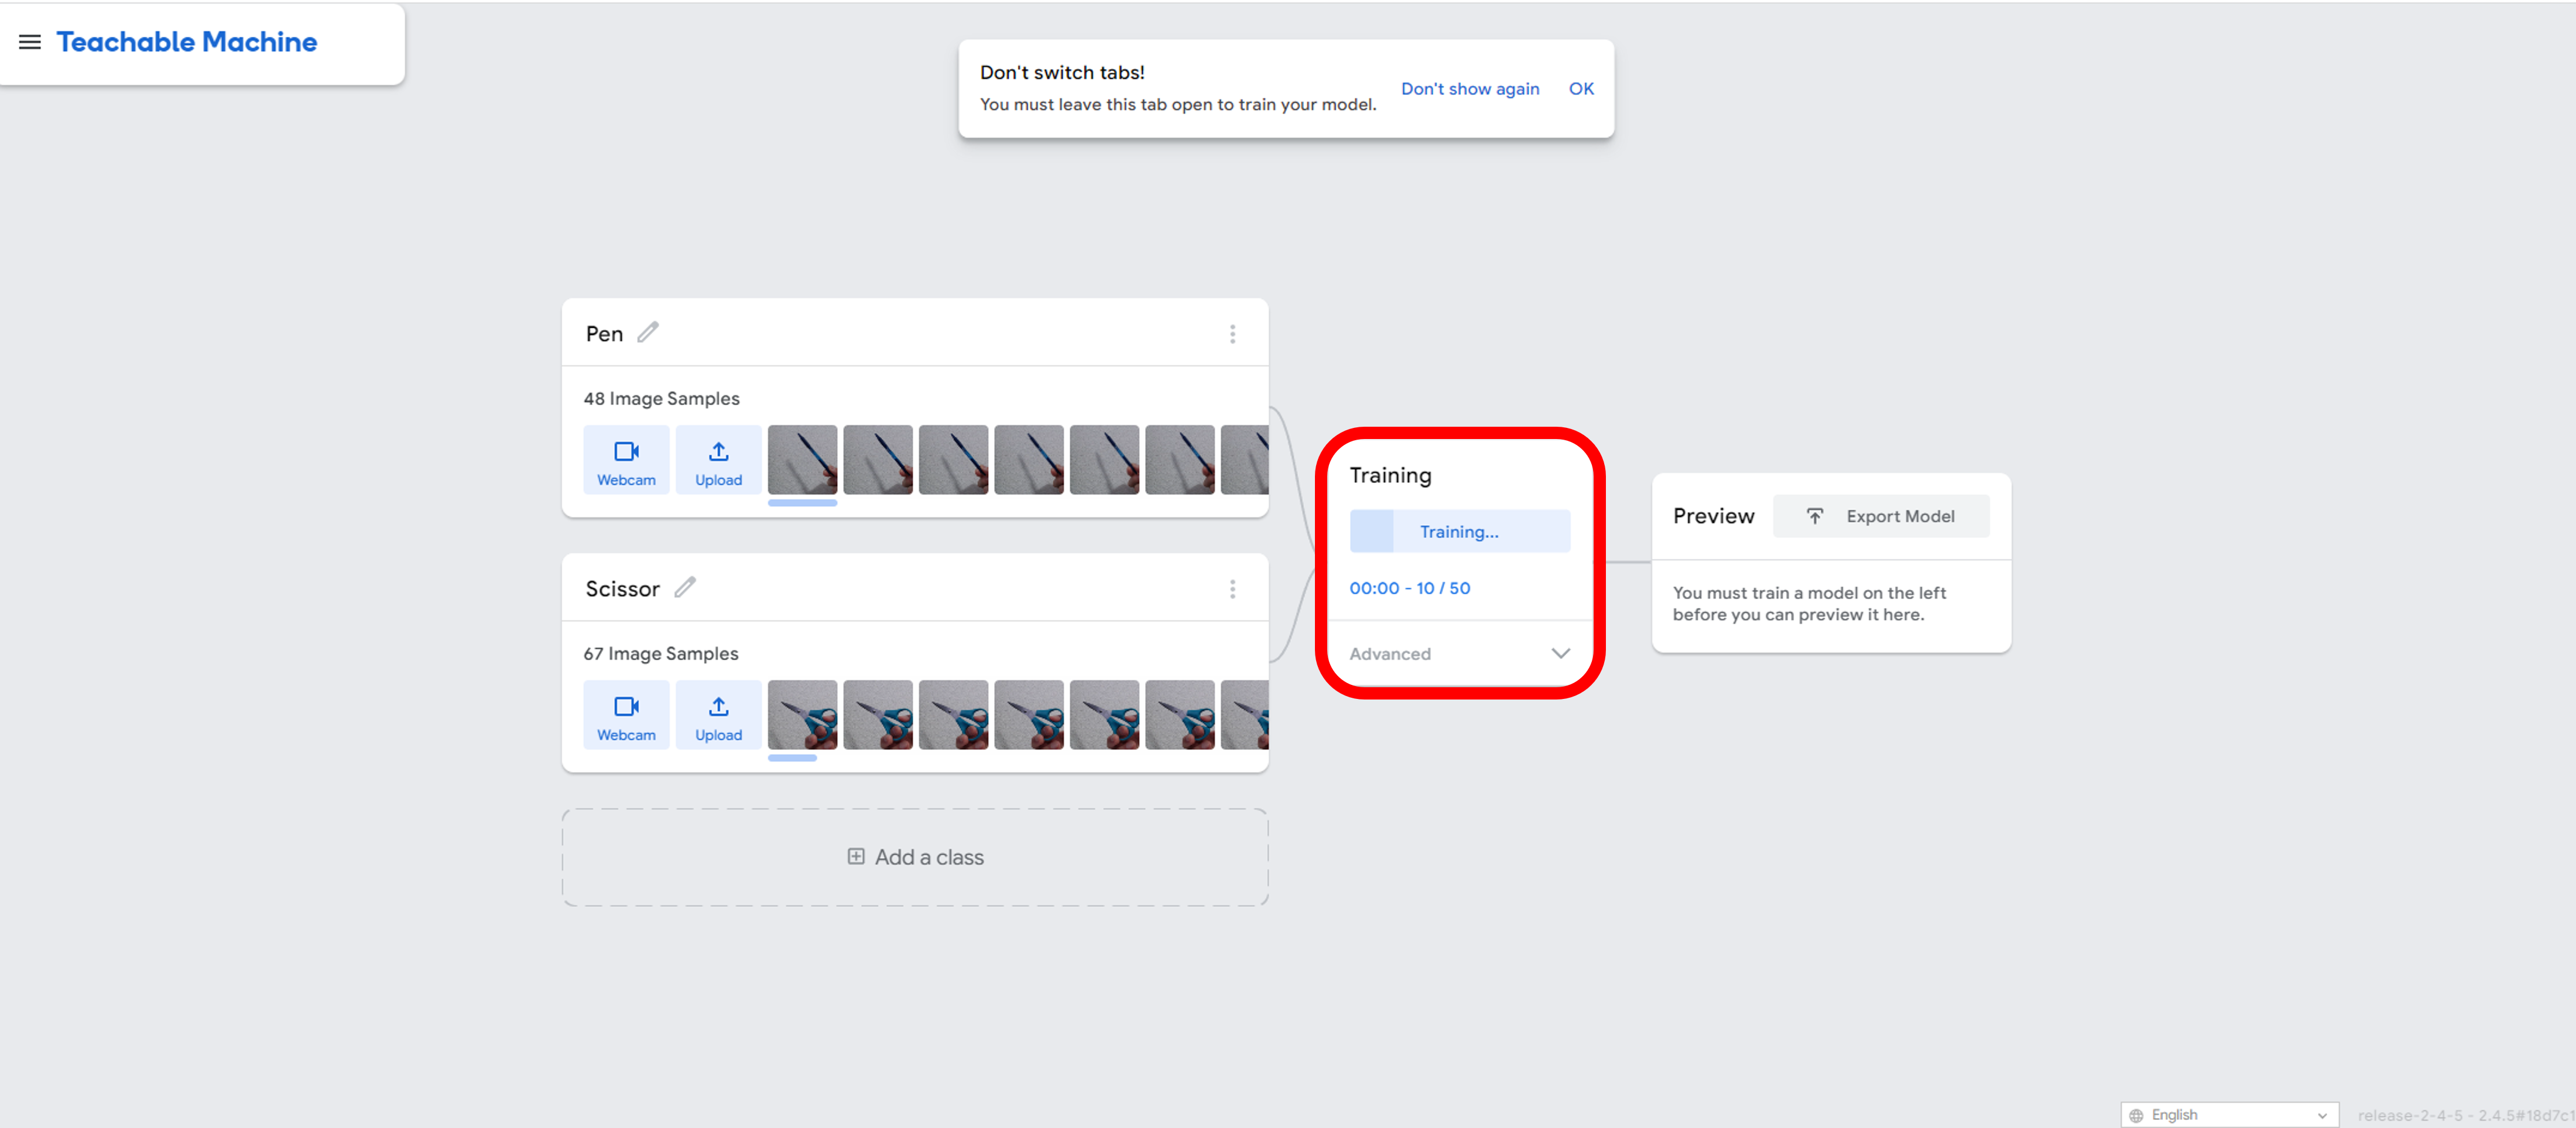
-
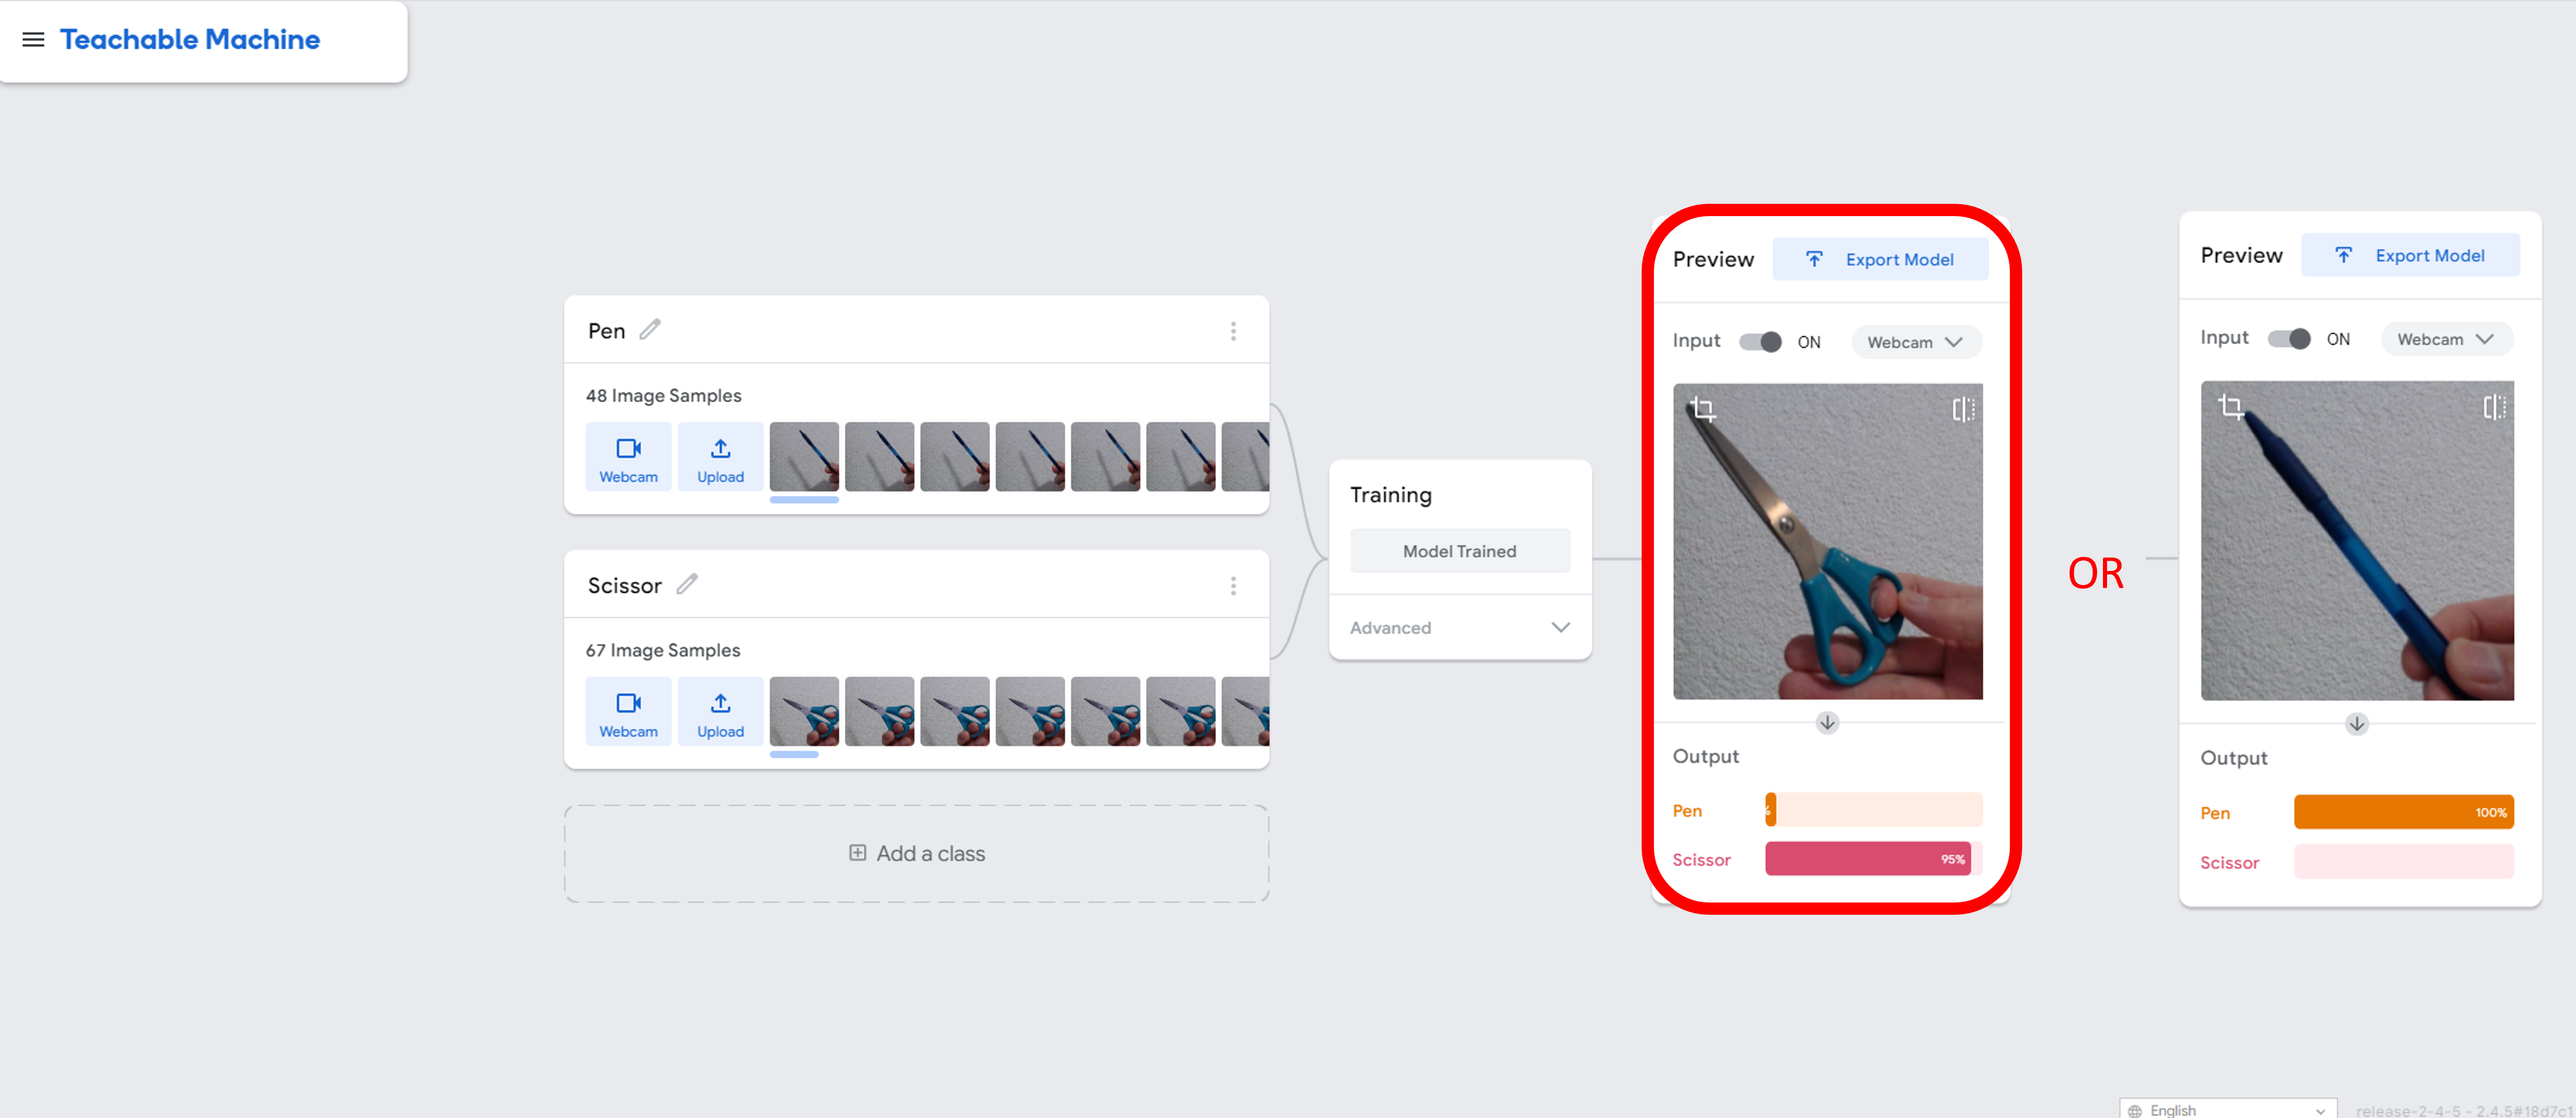
Additionally, you can preview the performance of the model on the right-hand side of the screen. The model will provide you with an output indicating how confident it is in its predictions for each of the classes.
Task 2: How to use Teachable Machine - Audio
This following tutorial is originated from Snap, Clap, Whistle.
How to Train it
-
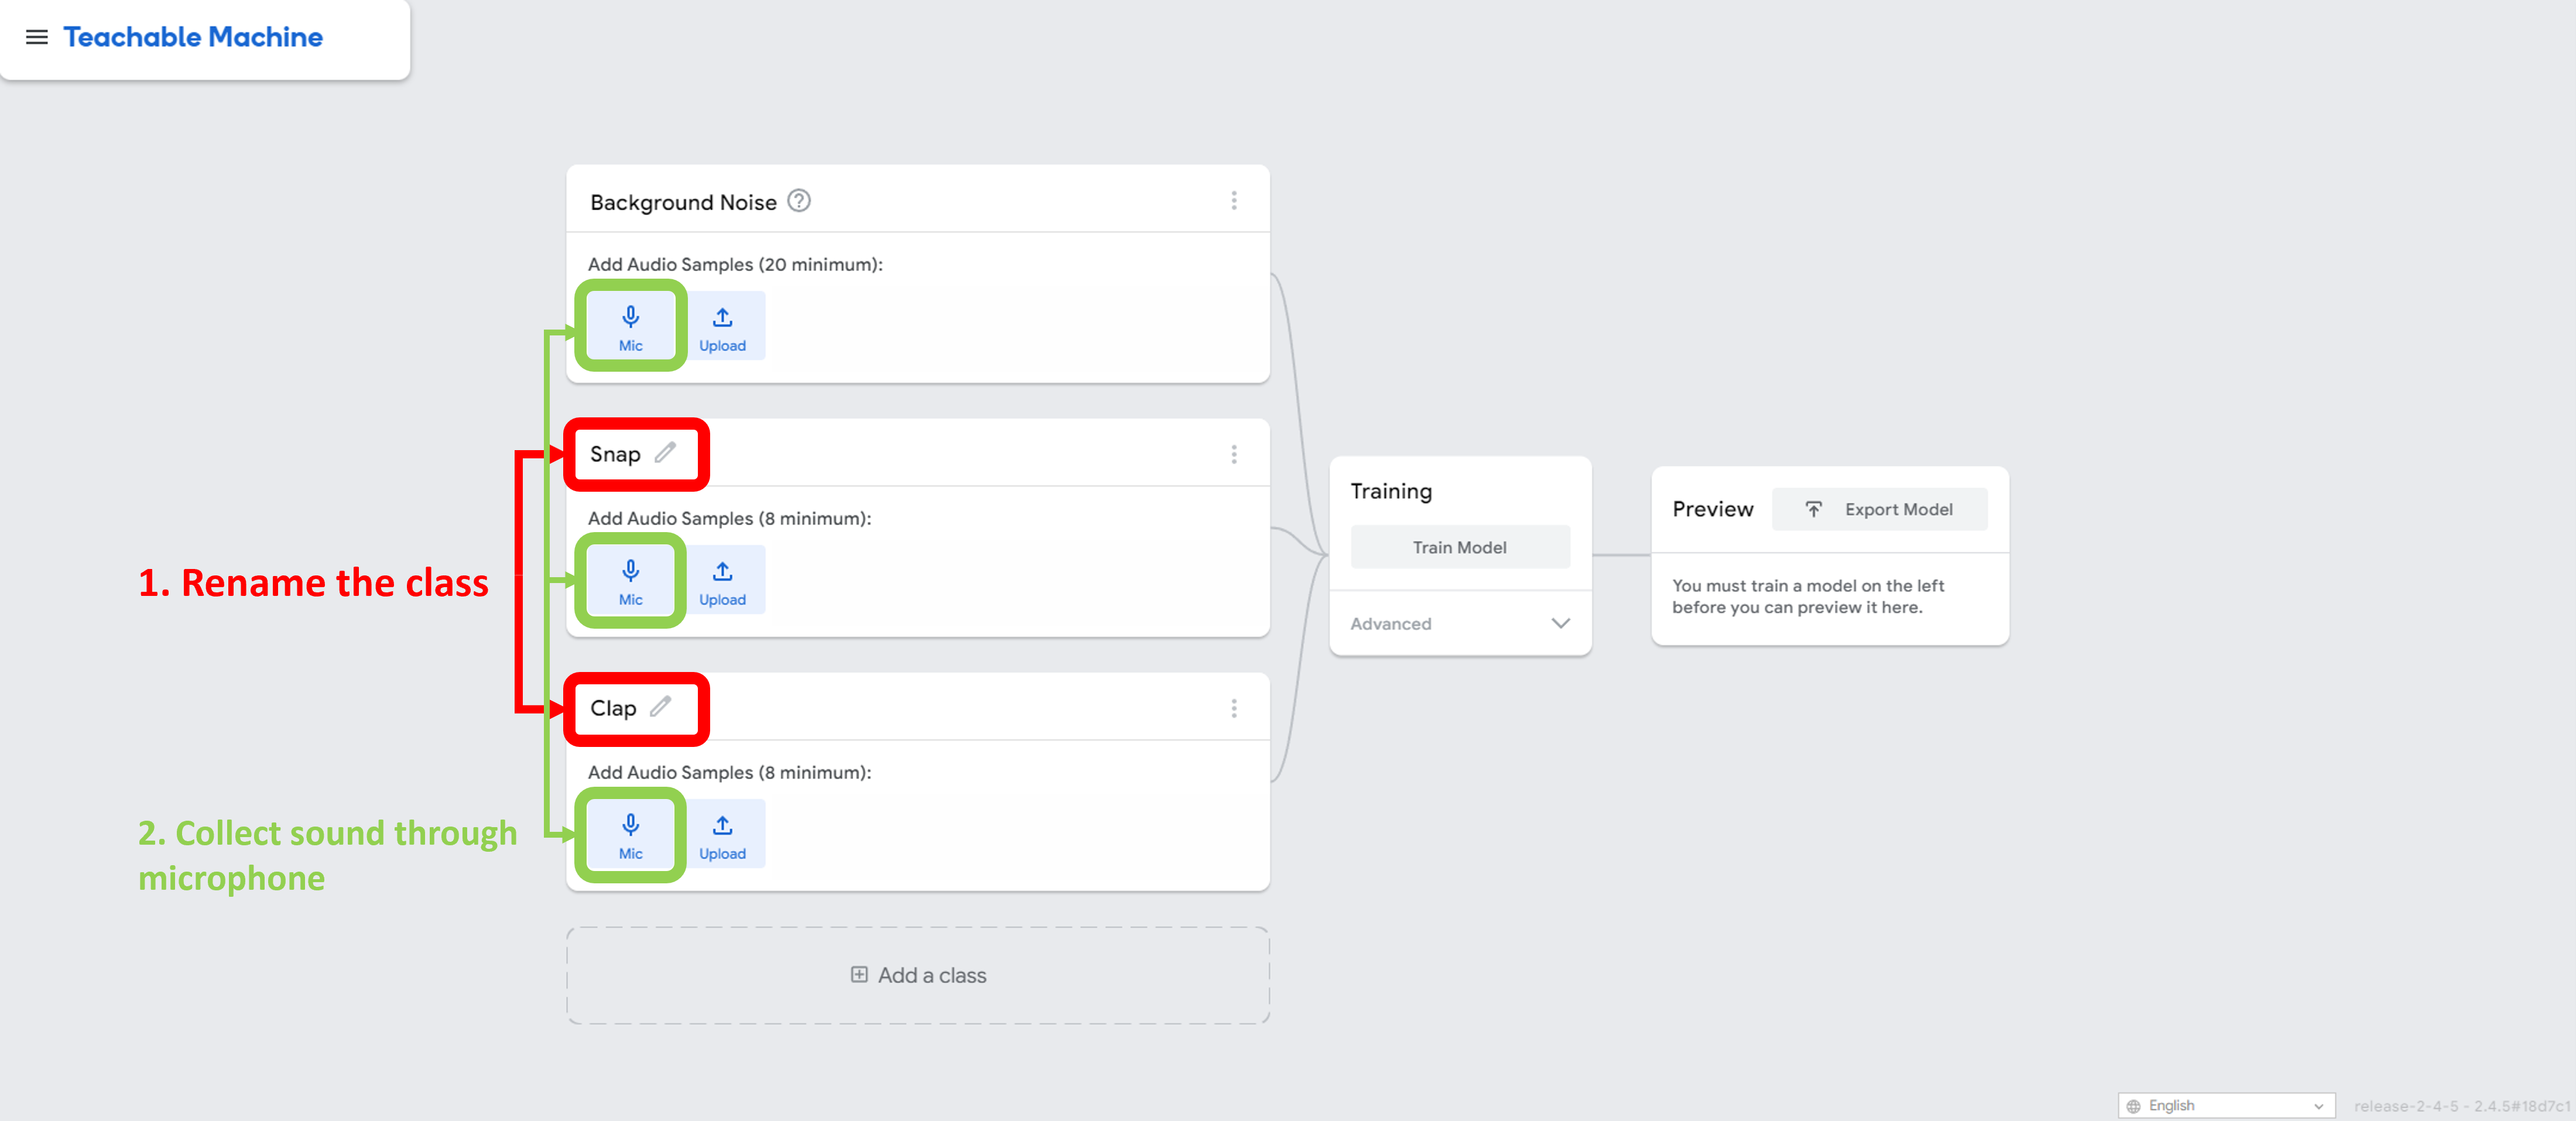
This task at hand involves detecting snaps and claps from a mixture of background noises. This means that the machine will have to be trained to recognize certain patterns in audio inputs and distinguish between different sounds.
-
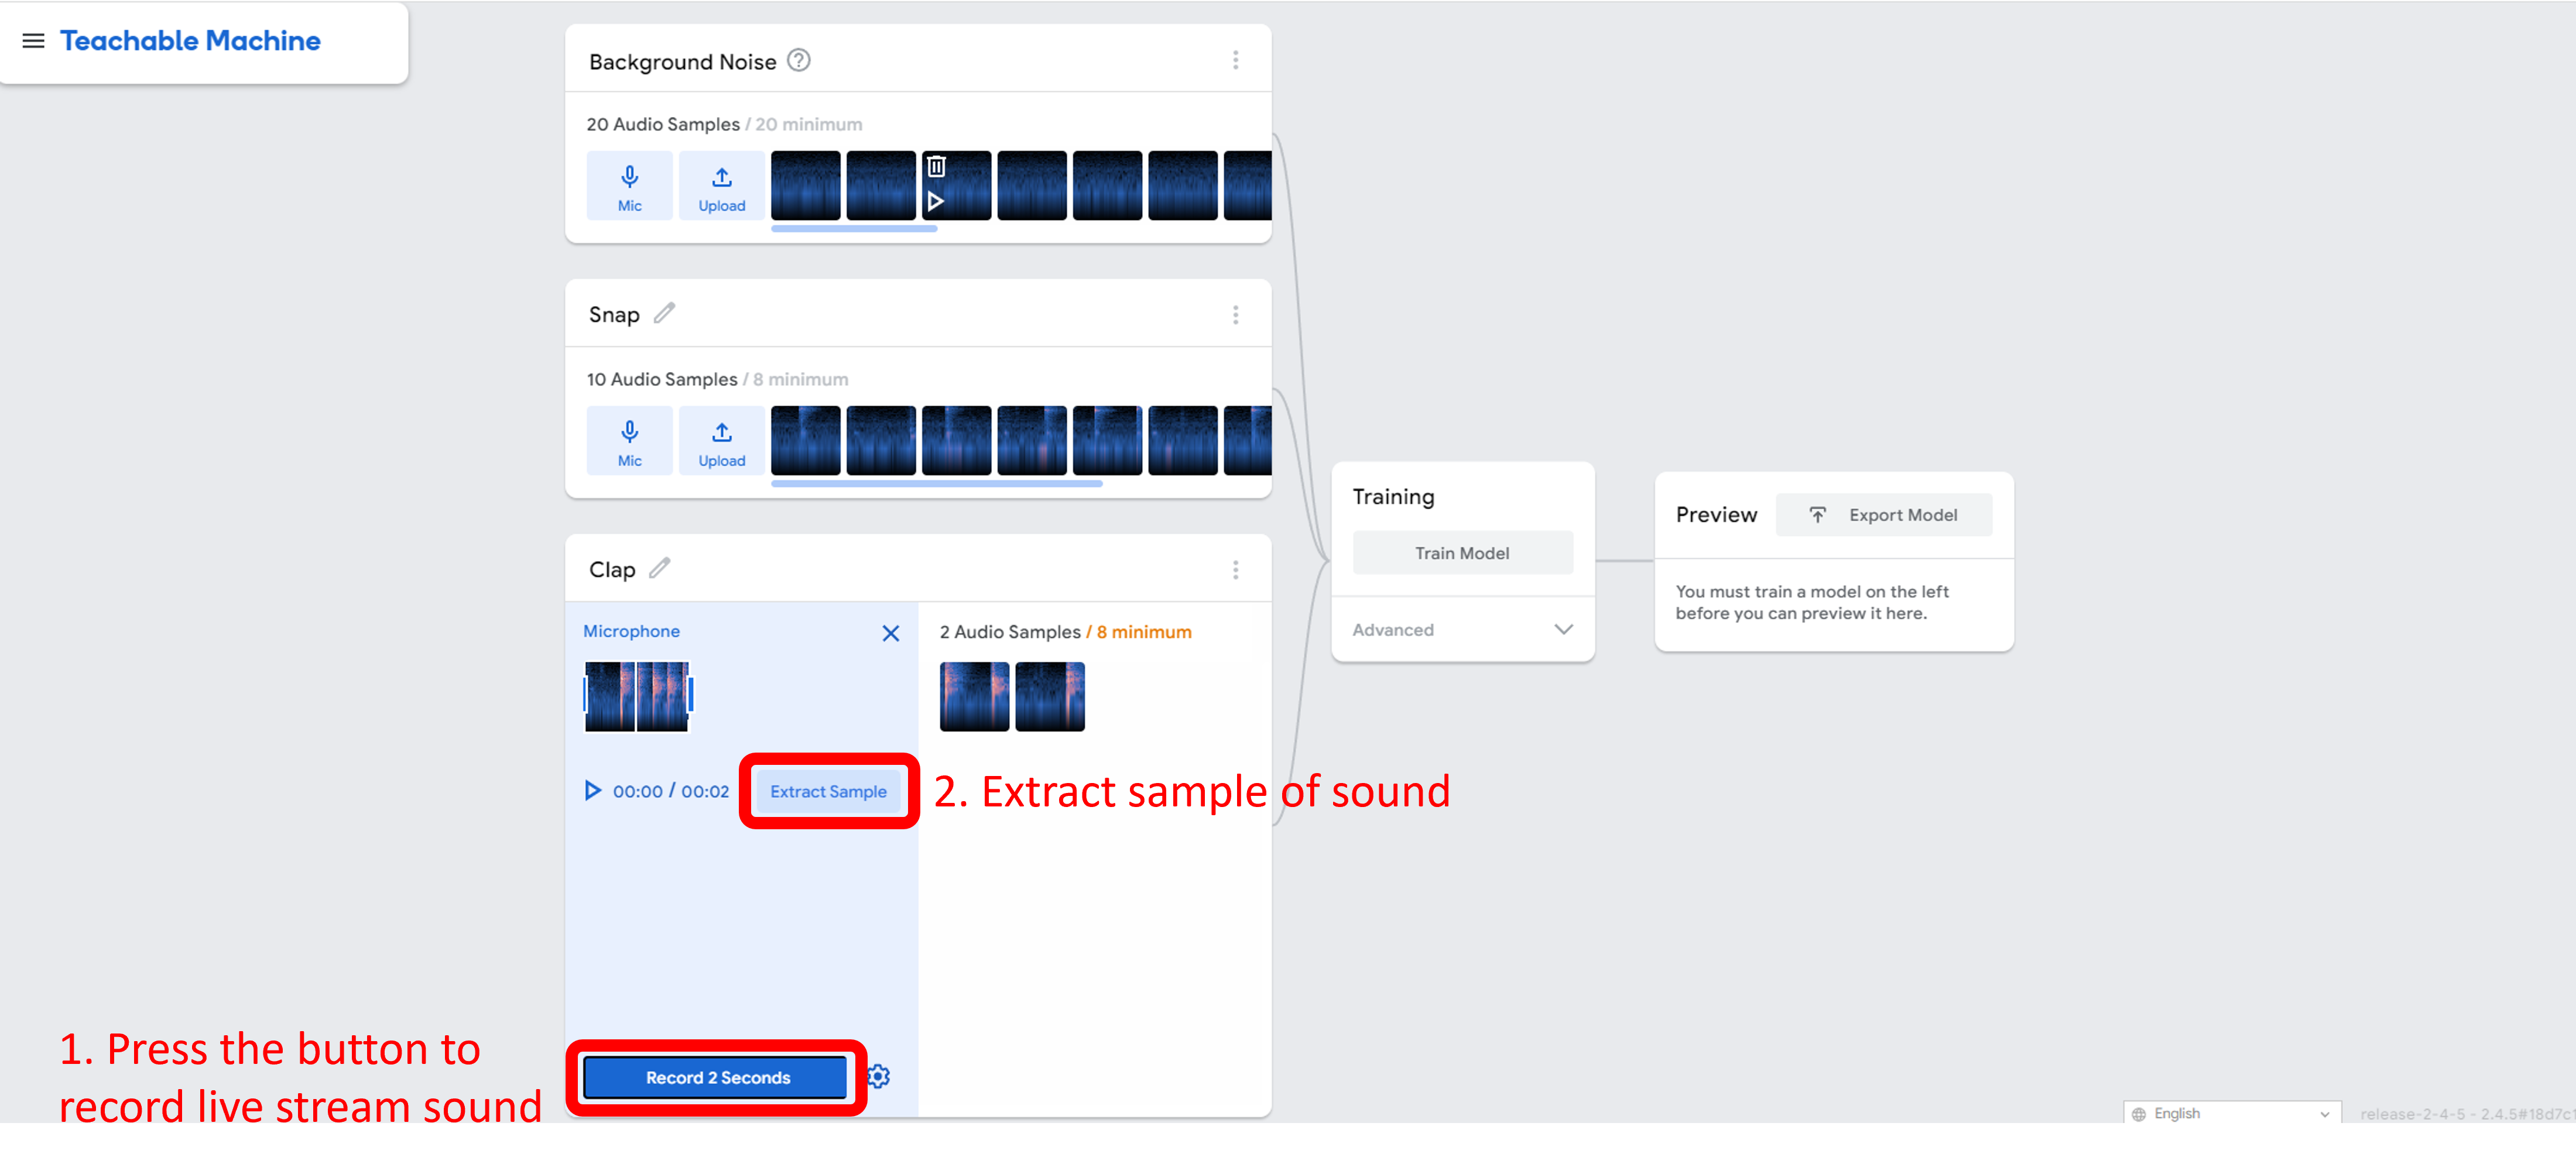
Now that the classes have been defined, it’s time to give the machine some examples to learn from. I will provide examples for all classes through microphone, including background noise, snap, and clap.
-
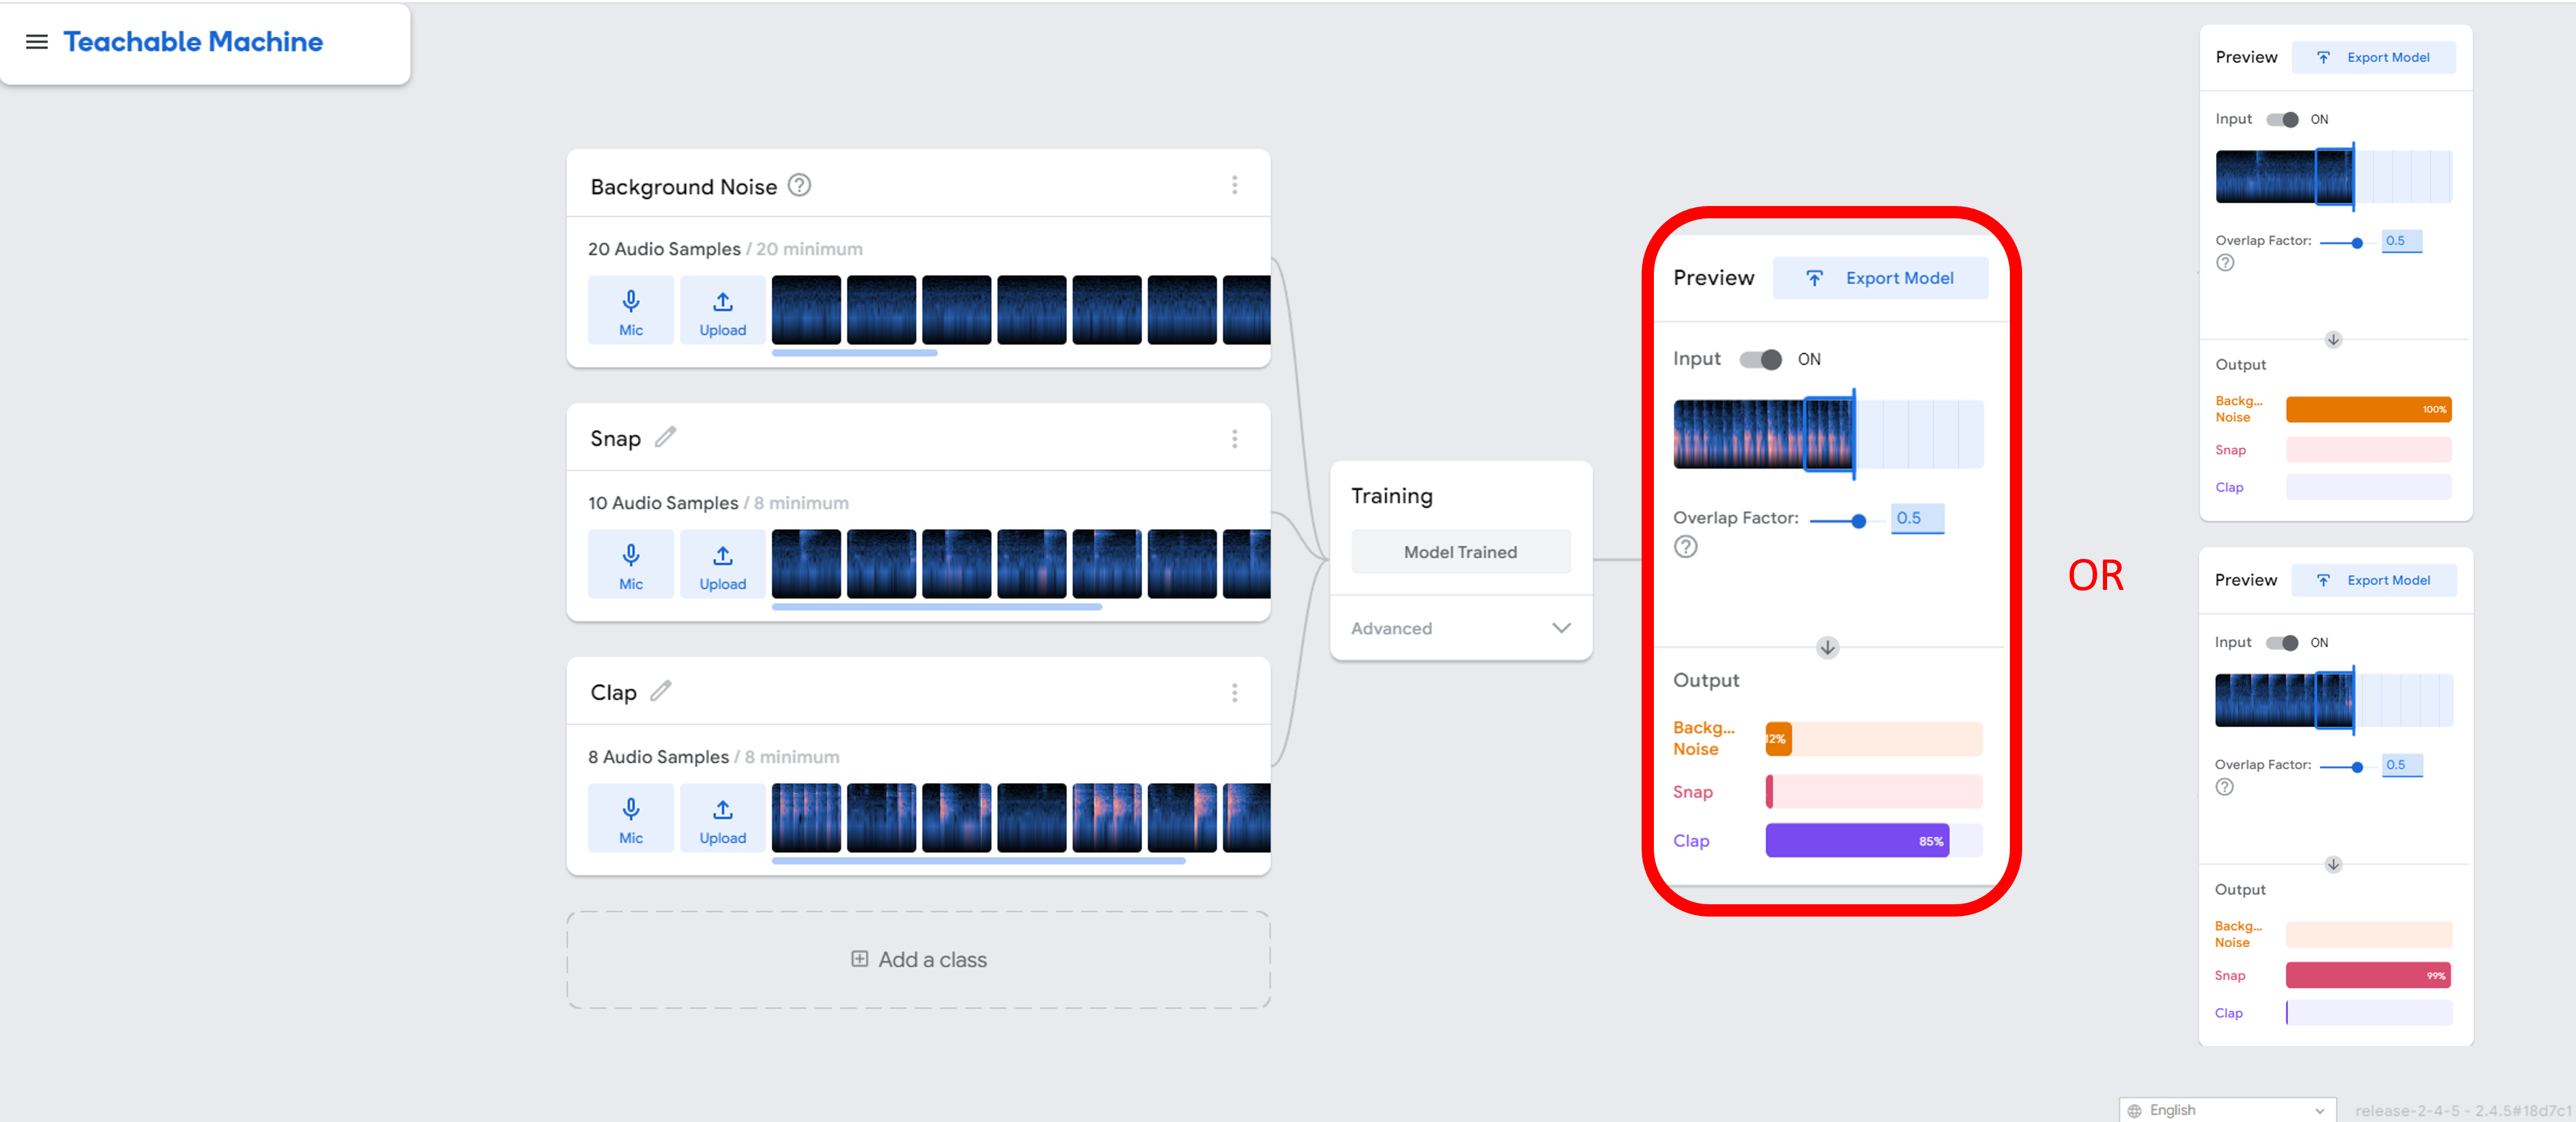
With all of the classes ready, it’s time to begin the training process. I simply need to hit the train button and the machine will start learning from the examples I have given for each class.
-
Additionally, you can preview the performance of the model on the right-hand side of the screen. The model will provide you with an output indicating how confident it is in its predictions for each of the classes.
Question: Why is it necessary to capture background noise as a class in the audio classification task?
Answer: The reason for recording background noise as a separate class in the audio classification task is to enhance the machine’s understanding of the context in which the audio is recorded. Background noise, such as traffic sounds, music, or people talking, can often interfere with the audio recording and affect the machine’s ability to accurately classify the audio. By having background noise as a distinct class, the machine can learn to distinguish between the actual audio and the background noise, which can result in improved performance and accuracy.
Question: What about the image classification task?
Conclusion
In this preparation, we have gained an understanding of how to use Teachable Machine for both image and audio classification. We have learned how to build and train models that are capable of recognizing patterns and objects within these two data formats. By following this preparation, we now have the skills and knowledge to create custom machine learning models that are tailored to specific use cases.
Extra Resources
- Frequently asked questions: https://teachablemachine.withgoogle.com/faq
- Teachable Machine Tutorials: https://www.youtube.com/playlist?list=PLJfHZtseuscuTQfodmFnbZ3rBgCWsRT9t
- Predict poses with Teachable Machine: https://medium.com/@warronbebster/teachable-machine-tutorial-head-tilt-f4f6116f491